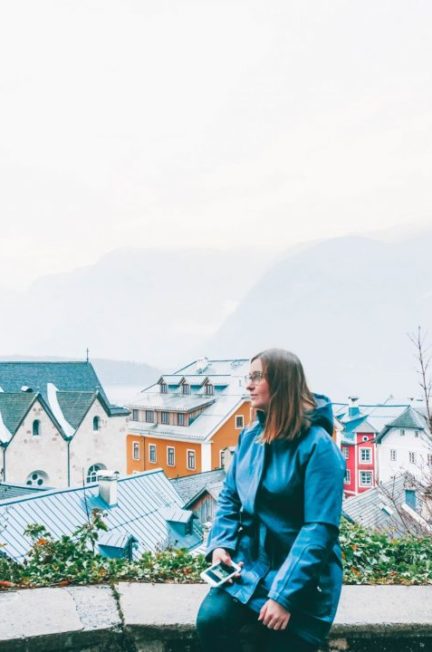
Solo travel has somehow, against all odds, become the love of my life. I really think it’s amazing, and something that everyone should experience at least once in their life. But when it comes to how to take pictures of yourself… well, that can be a trial.
I’ve been regularly traveling solo for two years now and by far one of the most common questions I get is “how do you take pictures of yourself?”
Well, it’s been a progression.
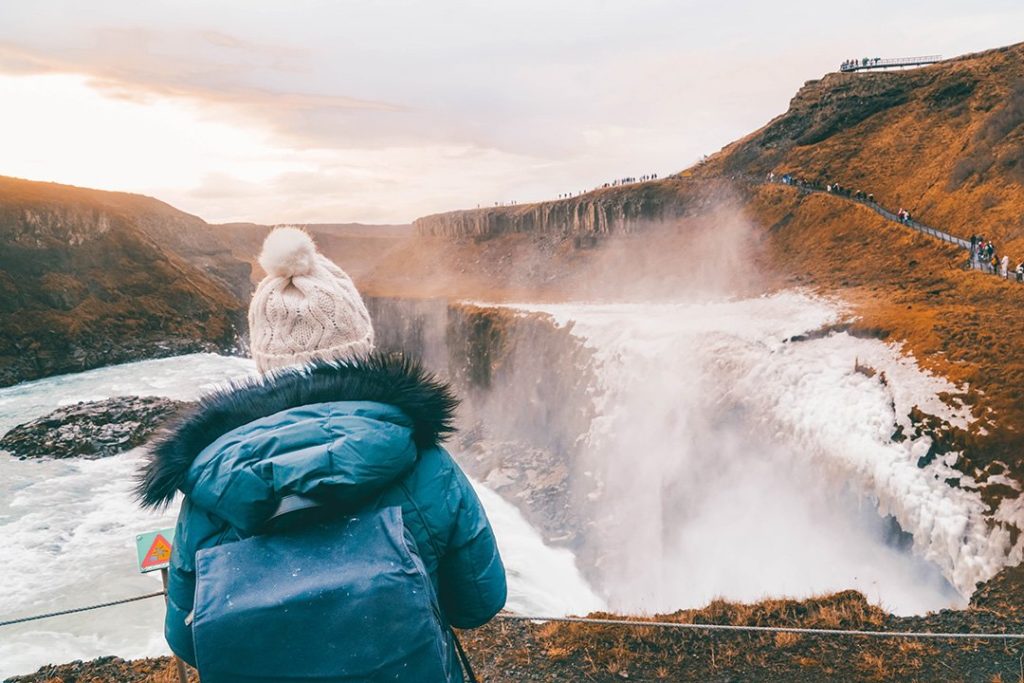
On my first ever solo trip, I alternately took selfies and rested my camera on snowbanks (would not recommend).
Now, I have it down to a science. I have a whole process that continually gets me shots that I love. And I figured it was about time I share my knowledge with all of you. So here’s everything I’ve learned about how to take pictures of yourself when you’re traveling solo!

HOW TO TAKE PICTURES OF YOURSELF WHEN YOU’RE TRAVELING SOLO: EQUIPMENT YOU NEED
- A Camera – While phone photos are fine, to use the process I’m going to be detailing below I highly recommend having an actual camera! I use a Sony Alpha A6300 and am totally in love with it.
- Tripod – The easiest way to take photos of yourself when you’re traveling solo is with a tripod. I use the MePhoto Backpacker Air tripod and highly recommend it. It’s super lightweight, easy to set up, and not too expensive! If you don’t want to carry around a full tripod, then a GorillaPod is another good option. You can use it as a mini tripod or wrap it around things like lampposts.
- Remote control – There are loads of cheap Bluetooth remote controls for cameras available on Amazon, and they make taking photos of yourself way easier than using the self-timer function.
Also check to see if your camera has a phone app that you can use as a remote! - Intervalometer – The ultimate piece of equipment for solo travel photography. You can set it up to take a photo every second or so, which means no more clicking on a remote. This is the one I use.
- Camera backpack – with all of this equipment, you’re going to need something to carry it all! I recently invested in the Jo Totes Bellbrook Camera Backpack and am obsessed. It has awesome, easy-to-access side pockets for your camera and an extra lens, a top pocket for other things or extra equipment, and a pocket for your laptop as well! If you’re on a budget, this backpack is similar.
HOW TO TAKE PICTURES OF YOURSELF WHEN YOU’RE TRAVELING SOLO: MY PROCESS
I’ve been taking pictures of myself while travelling solo for a long time now. I’ve got it down to a science. Here’s the process that I recommend for how to take pictures of yourself when you’re travelling solo.
STEP ONE: FIND YOUR SPOT
When you’re traveling and see somewhere you’d like to have a picture of yourself with, the next step is to look around and find a spot to set up. Unlike when you’re travelling with a group, you can’t just stand anywhere and hand your camera off to someone. Instead, you’ve got to do a bit more work.
When it comes to setting up a tripod with your camera, you want to find a spot that
- Is stable enough to set a tripod on
- Won’t get in the way of everyone
- Won’t get your camera stolen
In general, I try to steer clear of setting up my tripod in areas that are super crowded. Not only is it likely to get in the way of everyone else, but it’s also hard to make sure that it won’t get stolen. Since you have to walk away from your tripod when you’re taking a picture of yourself, you don’t want to do so in an area where someone could just walk by and swipe it up.
I usually try to set up my tripod a little bit to the side of the action. Even if it isn’t the exact angle that I want, it’s worth it for the peace of mind.

STEP TWO: SET UP YOUR TRIPOD
Once you’ve found your spot, it’s time to start setting up! The first thing I always set up is my tripod. What I really love about the Backpacker Air, besides it being super lightweight, is that it sets up super quick. Just twist the legs, pull them out, and twist again to lock.
I usually set up my tripod to its full extended height unless I’m trying to get an artsy low-angle shot. At it’s full extended height it’s just below eye level of your average human, which makes from great straight-on shots.
Then, screw your camera onto the top of the tripod.
STEP THREE: ADJUST YOUR CAMERA SETTINGS
If you’re an advanced photographer who shoots in manual, take this time to set your aperture, shutter speed, etc. and make sure that it all looks good. When it comes to focusing, I usually try to find something in the background that’s about the same distance from the camera as where I want to stand.
If you’re still shooting on automatic, then portrait mode is usually the way to go!
STEP FOUR: ATTACH YOUR INTERVALOMETER/SET UP YOUR REMOTE
Once you’ve got your camera turned on, it’s time to set up how you’re going to take pictures of yourself when you’re not standing right next to the camera. Here are the two ways that I suggest:
USE AN APP/REMOTE CONTROL
Most DSLR and mirrorless cameras these days have bluetooth capabilities and apps that can act as remote controls. To see if your camera has one, just Google your camera name + remote control app and it’ll probably pop up!
The great thing about using an app on your phone is that you don’t have to splurge on another piece of equipment. They’re also generally really easy to use. You just have to connect it to your camera and then click the button on your phone when you want to take a picture!
I used the Sony PlayMemories app for ages until I upgraded to…
AN INTERVALOMETER
An intervalometer is basically just a little remote that triggers your camera shutter to take a photo at a specific interval, like every 30 seconds. They’re commonly used for timelapse photography, but they’re also perfect for our purposes! This is because you can just click a button once and you don’t have to keep running back to your camera.
I usually my intervalometer to take a picture every second for a minute. Then I can just keep posing for a minute straight and have loads of photos to choose from!
This is the Intervalometer that I use for my Sony camera. Here are ones for Canon, Nikon, and Olympus.
USING THE SELF TIMER FUNCTION
If your camera doesn’t have an app and you’re not ready to spend any money, then you can also use the self timer function on your camera. This can get real tiring real fast though, and there are also really cheap bluetooth camera remotes out there so I don’t really suggest it!

STEP FIVE: TAKE A TEST SHOT & START SHOOTING
Now that you have everything set up, I recommend taking a quick test shot just to make sure everything is how you like it. Then, press start on your intervalometer or grab your remote and get shooting!

STEP SIX: REPEAT
While it can have a bit of a learning curve, taking photos of yourself this way will soon get addicting. So every time you find a spot where you want a photo shoot, go through the process! I promise you’re going to love the results 🙂
HOW TO TAKE PICTURES OF YOURSELF WHEN YOU’RE TRAVELING SOLO: EXTRA TIPS
FIND INSPIRATION
One of the great things about taking photos of yourself is that you have full creative control. So instead of handing off your camera to someone who doesn’t really care, you have the chance to get exactly what you want. I love scrolling through Instragram for photography inspiration. I look both at places that I’m going to go for location inspiration and photos in general for posing inspiration!
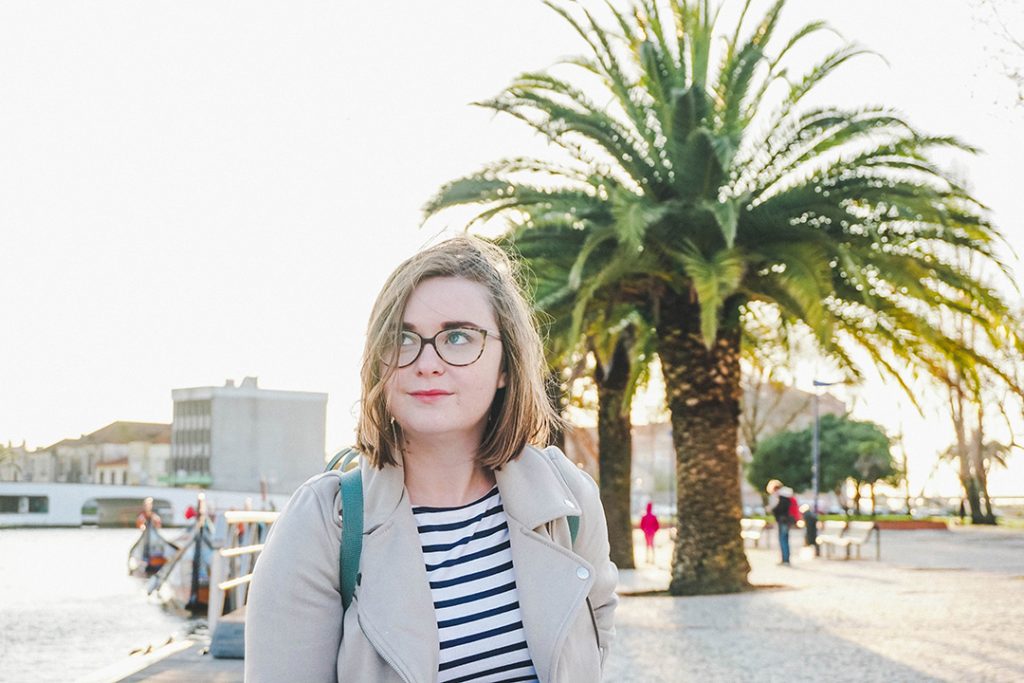
MAKE SELFIES NOT LOOK LIKE SELFIES
Sometimes, you might just need to take a selfie. But if you want thing to look a little bit more ~professional~, here are a few ways to make a selfie look like what it’s not:
- Make sure the arm holding your phone/camera isn’t in the shot. This is an instant giveaway. Same thing if you’re using a selfie stick.
- Play with angles. Selfies don’t have to be straight on. Fun angles can make things look much more interesting.
- Embrace it. If you’re taking a selfie, you’re taking a selfie! Have fun with it and don’t care what other people think.
One of my favorite solo travelers out there, Gloria, takes AMAZING pictures of herself. But she also totally embraces the selfie and I love it! She’s always a great source of inspiration.
ASKING OTHERS FOR HELP
If you really have no other choice, or just aren’t ready to become a public spectacle with your tripod, then asking others for help is another way to get photos of yourself when you’re traveling solo. Of course, asking others to take a photo of you can be a recipe for disaster. Here’s a few things I always try to do when I ask someone else to take a photo of me.

- Look for someone who also has a nice camera – this is mostly for peace of mind, since them having a nice camera lowers the chances of them running off with mine. But hopefully, if they have a really nice camera they also know how to use it. So they’ll be more comfortable using mine!
- Look for a younger woman – I also usually try to find another girl around my age if I can. This is because she’s likely to be familiar with Instagram and the style I’m going for. She’s also more likely to not just take one quick shot and be done with it. Is this totally judgemental? Yes. But it also works.
- Adjust your settings before handing your camera off – Most people don’t know about camera settings and will just point-and-shoot. So always adjust your settings the way you want them first!
- Give them a little bit of instruction – Without instruction, they won’t know what to do, and you’ll get a simple straight on shot. If, on the other hand, you tell them the sort of picture you’re going for and angle the camera the way you want it, you’re more likely to get an awesome shot! It also never hurts to ask them to take multiple photos, so you have a few to choose from!
- If you’re shy, start by taking walking tours and asking your fellow tour mates – I always find it a lot easier to ask someone to take a picture of me if we’ve already been walking around for a little while and everyone is stopped to take photos! This is also a good time to ask people to take pictures of you because you probably won’t have time to set up your tripod 😉
- Offer to take a picture of them too – This is just polite! Whether they’re travelling solo or with a group, they’ll love the chance to have a photo with everyone (or just themselves) in it!
Pin it for later!


This is the first time that I ever heard of an Intervalometer, sound pretty useful and easy to use. I have to check it out on our next shopping trip.
[…] ↠ Read next: How To Take Pictures of Yourself When You’re Traveling Solo ↞ […]
[…] It can be nice to bring along a lightweight tripod for nighttime photography or if you’re traveling solo. […]